WooCommerce
Sync your WooCommerce order data into Kenzi so your support team can see a customer’s recent orders right inside the conversation — no tab-switching or “what’s your order number?” needed.
What You’ll Need
Section titled “What You’ll Need”- The Kenzi Chat plugin installed, activated, and connected to your workspace — see WordPress if you haven’t done this yet
- WooCommerce installed and activated on the same WordPress site
Install the Plugin
Section titled “Install the Plugin”Choose whichever method suits your workflow. All three produce the same result.
Download the ZIP
Section titled “Download the ZIP”- Download the latest release from GitHub.
- In your WordPress dashboard, go to Plugins > Add New Plugin.
- Click Upload Plugin and select the ZIP file you downloaded.
- Click Install Now, then click Activate.
Install with Composer
Section titled “Install with Composer”If you manage your WordPress site with Composer:
composer require kenzi-chat/woocommerce-pluginThen activate the plugin in your WordPress dashboard under Plugins.
Install from GitHub
Section titled “Install from GitHub”You can also clone the repository directly into your plugins directory:
cd wp-content/pluginsgit clone https://github.com/kenzi-chat/woocommerce-plugin.git kenzi-commercecd kenzi-commercecomposer install --no-devThen activate the plugin in your WordPress dashboard under Plugins.
Enable Commerce Sync
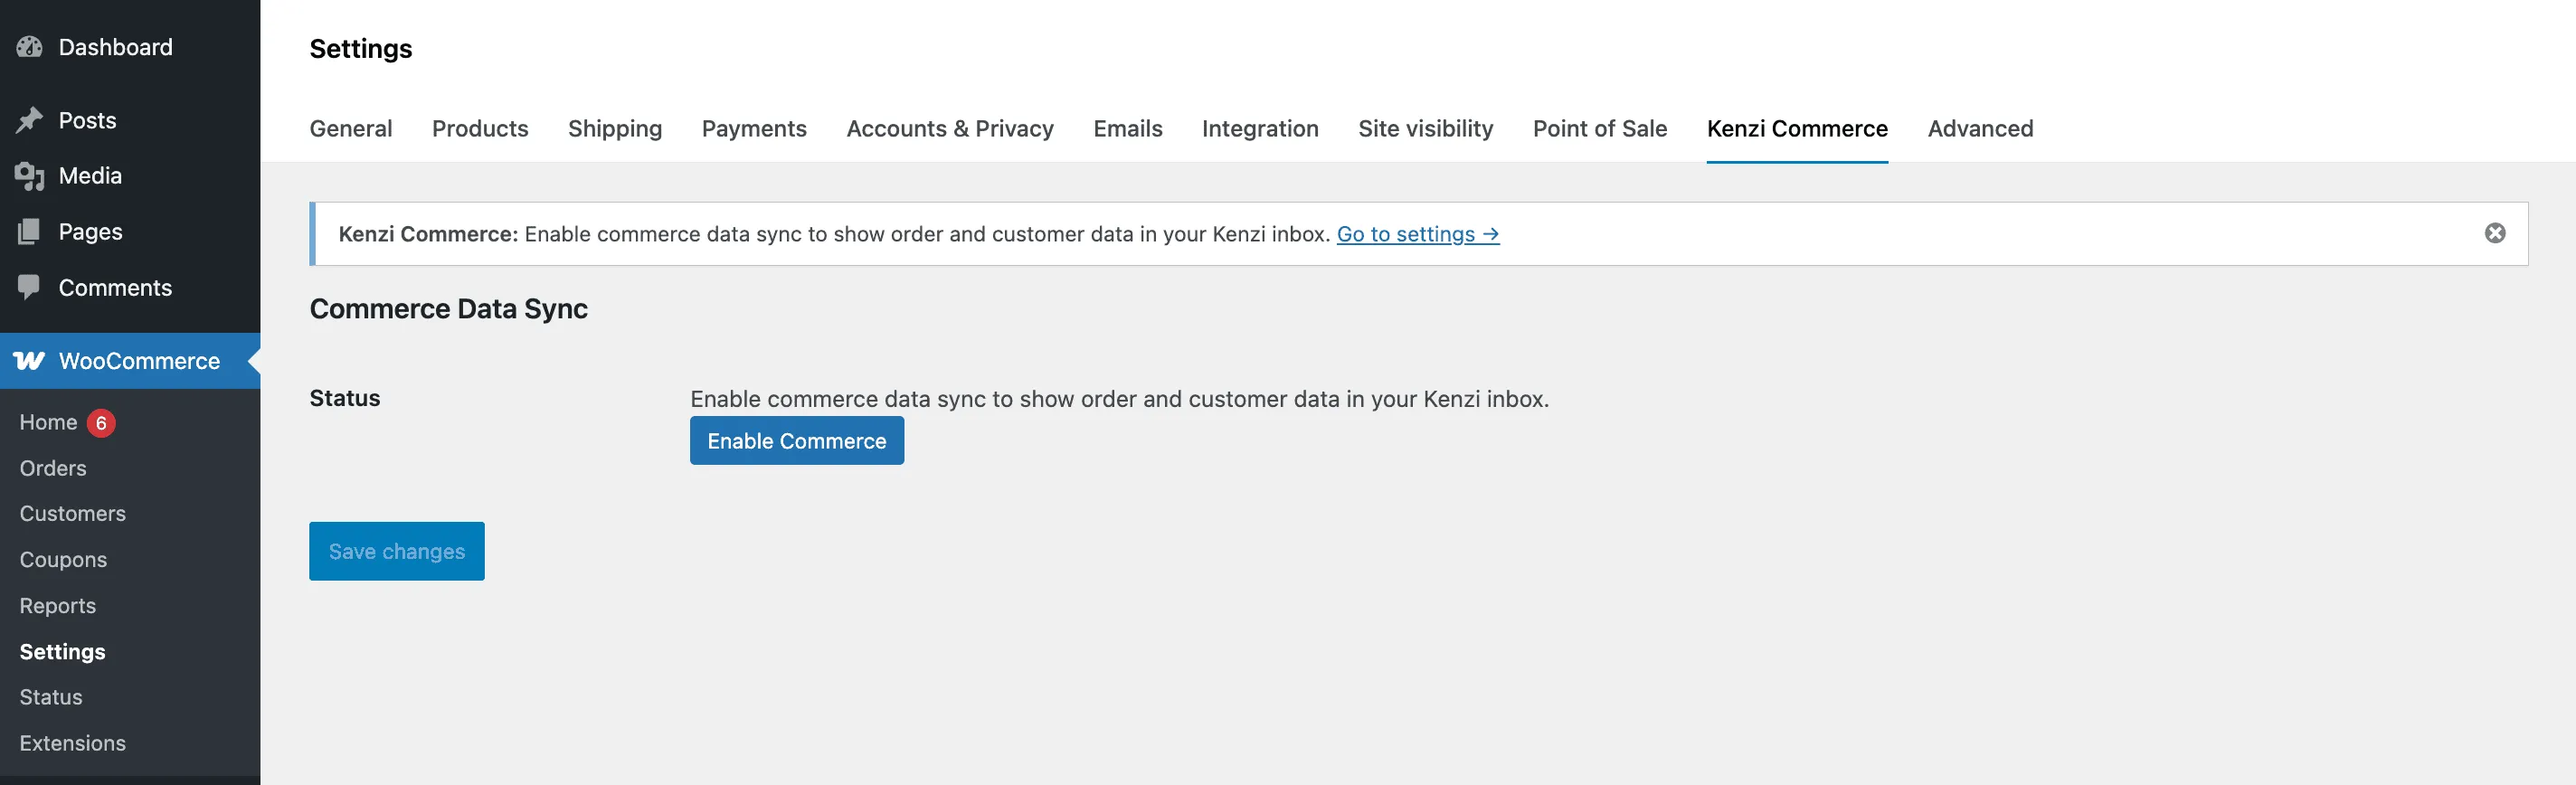
Section titled “Enable Commerce Sync”- Go to WooCommerce > Settings in your WordPress dashboard.
- Click the Kenzi Commerce tab.
- Click the Enable Commerce button.
 4. A popup will open — sign in to Kenzi if prompted, then approve the commerce data sync permission. 5. The popup closes and sync activates automatically.
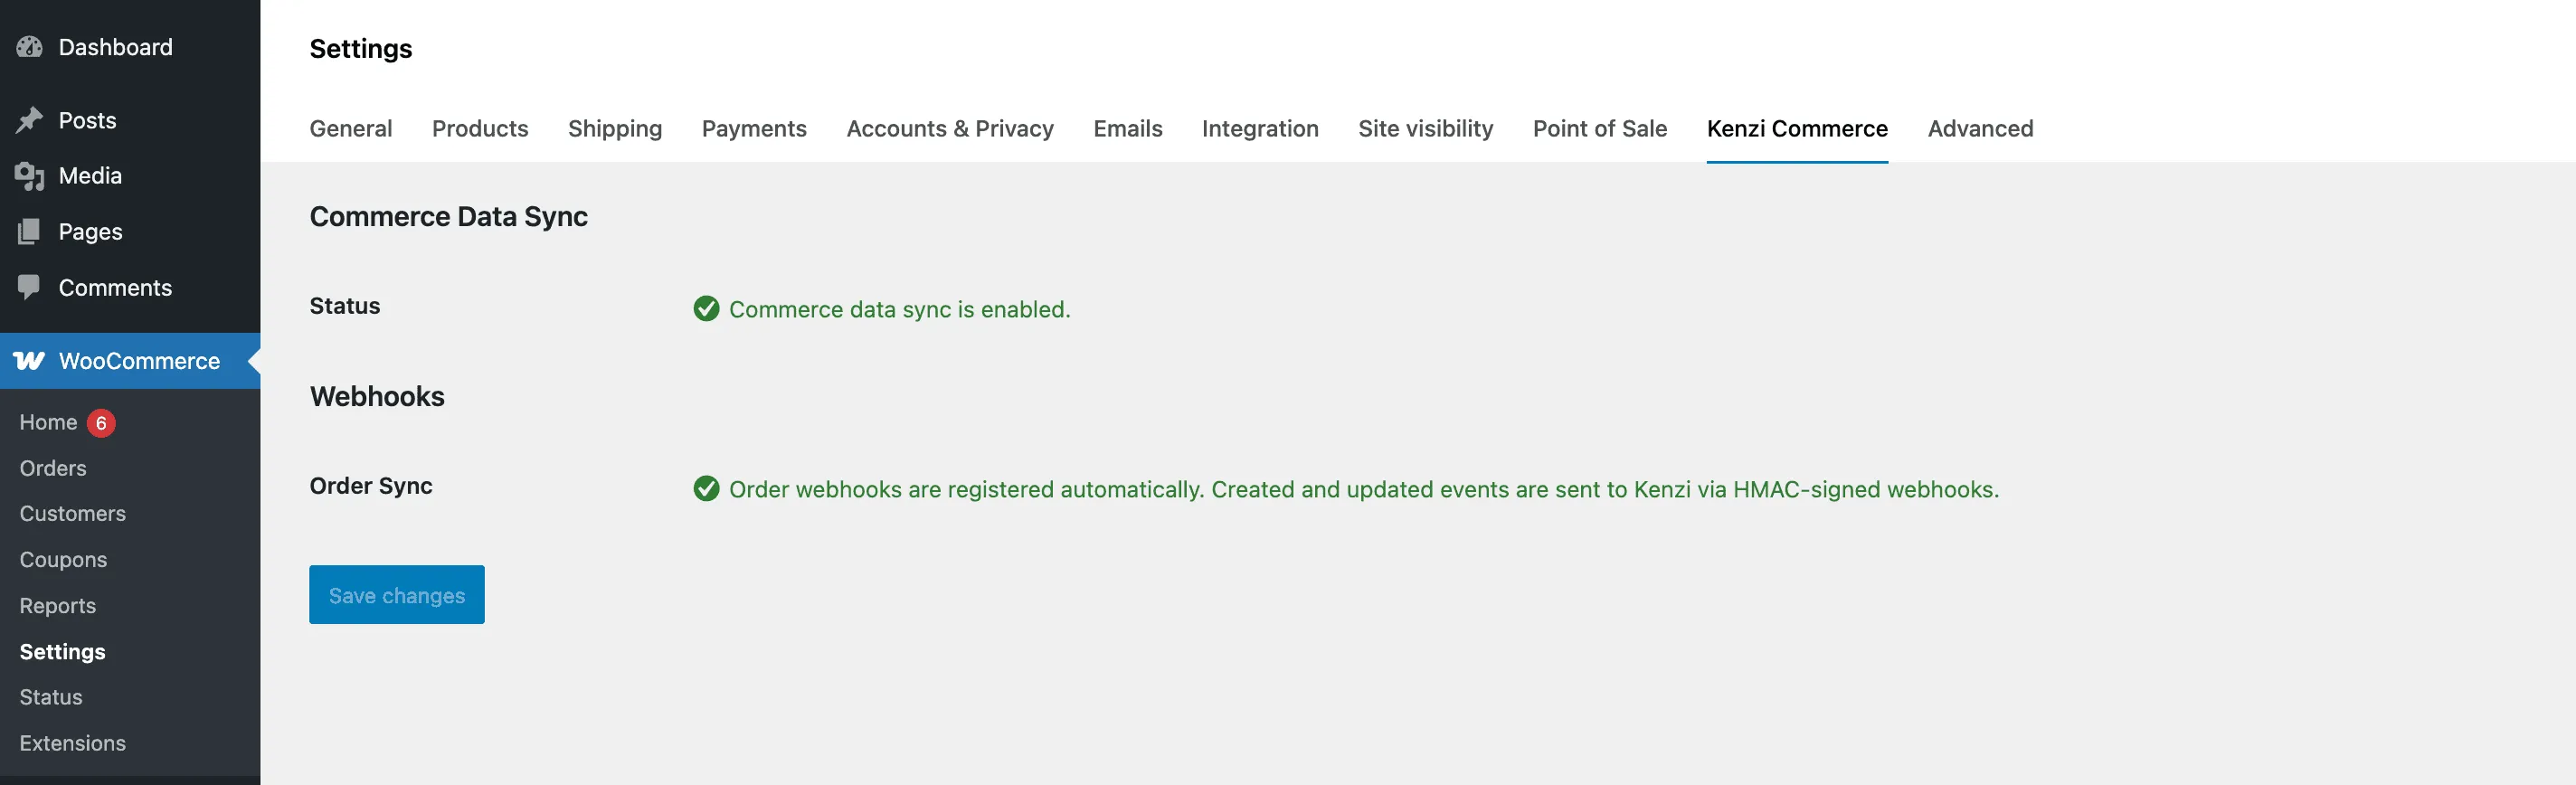
You’ll see a green Commerce data sync is enabled status on the settings page. Kenzi will start pulling in your recent order history in the background — this may take a few minutes depending on how many orders you have.
What Gets Synced
Section titled “What Gets Synced”Once commerce sync is enabled, Kenzi pulls in your existing orders and stays up to date as new ones come in:
| Data | Details |
|---|---|
| Orders | Order number, status (processing, completed, refunded, etc.), total, and date |
| Customers | Name and email from billing details |
| Products | Product names and prices from each order |
New and updated orders are sent to Kenzi automatically — there’s nothing you need to do to keep things in sync.
How It Looks in Kenzi
Section titled “How It Looks in Kenzi”When a customer reaches out through any channel — chat, email, Facebook, or Instagram — Kenzi automatically matches them to their order history using their email address. Your support agents will see a Recent Orders section in the conversation sidebar with:
- The order status shown as a color-coded badge
- The products in the order
- The order total
- A link to open the full order in your WooCommerce admin
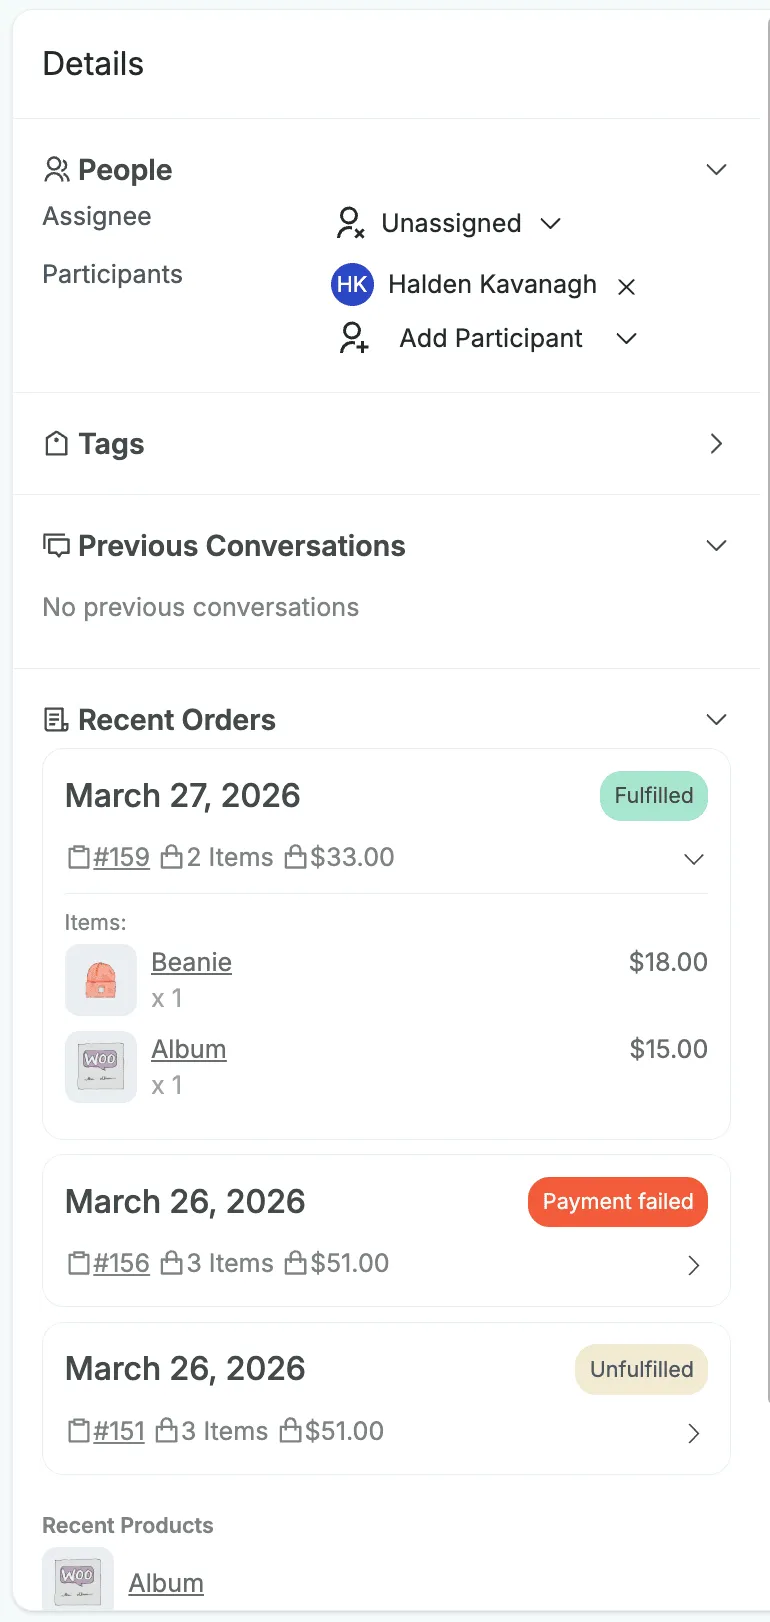
This gives your team instant context so they can help customers faster.
When a Customer Changes Their Billing Email
Section titled “When a Customer Changes Their Billing Email”If a signed-in customer places a new order using a different billing email than before, Kenzi updates their email to match the latest order. All of their past orders go with them. Searching the new email will show everything.
This only applies to signed-in customers. Guest checkouts with a different email always create a separate customer record.
Kenzi does this so each customer’s email matches whatever your store has on file for them right now.
Disable Commerce Sync
Section titled “Disable Commerce Sync”To stop syncing order data, deactivate the Kenzi Commerce plugin from the Plugins page in your WordPress dashboard.
Order data that was already synced to Kenzi will remain available, but no new orders will be sent.
WordPress Multisite
Section titled “WordPress Multisite”If you’re running a WordPress Multisite network, install and activate both the Kenzi Chat and Kenzi Commerce plugins once from the network admin dashboard — they’ll be available across all your sites.
However, each individual site still needs its own connection to Kenzi. Visit Settings > Kenzi Chat on each sub-site to connect it to your workspace, and WooCommerce > Settings > Kenzi Commerce to enable commerce sync. This is because each site has its own customers and orders, so each one needs a separate link to Kenzi.